
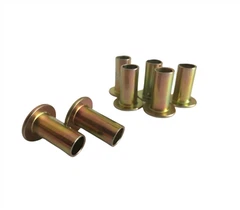



As an OEM rivets supplier, I've received numerous inquiries about the installation process of OEM rivets. In this blog post, I'll share a comprehensive guide on how to install OEM rivets, covering everything from the tools you need to the step - by - step installation process.

Tools and Materials Required
Before you start the installation of OEM rivets, it's crucial to gather all the necessary tools and materials. Here's a list of what you'll typically need:
- Rivets: Choose the appropriate type and size of OEM rivets according to your project requirements. For example, if you need a rivet with a smooth, rounded head, Button Head Solid Rivets might be a great option.
- Rivet Gun: A good quality rivet gun is essential for a successful installation. There are different types of rivet guns available, such as manual, pneumatic, and electric. Manual rivet guns are suitable for small - scale projects, while pneumatic and electric ones are more powerful and efficient for larger jobs.
- Drill and Drill Bits: You'll need a drill to create holes in the materials where the rivets will be installed. Select drill bits that match the diameter of the rivets you're using.
- Safety Equipment: Wear safety glasses to protect your eyes from flying debris, and gloves to prevent injuries to your hands.
Pre - installation Preparation
- Material Selection and Inspection: Ensure that the materials you're joining are clean, free of dirt, grease, and rust. The thickness and type of materials will also determine the size and type of rivets you should use. For example, thicker materials may require larger and stronger rivets.
- Marking and Drilling: Use a measuring tool to mark the exact locations where you want to install the rivets. Then, use the drill and the appropriate drill bit to create holes in the materials. Make sure the holes are straight and of the correct diameter. The holes should be slightly larger than the shank of the rivet to allow for easy insertion.
Step - by - Step Installation Process
- Insert the Rivet: Take a rivet and insert it through the holes in the materials you're joining. Make sure the rivet is inserted all the way through and that the head of the rivet is flush against one side of the material.
- Load the Rivet Gun: Open the jaws of the rivet gun and insert the mandrel (the thin rod in the center of the rivet) into the nose of the gun. The jaws of the gun should grip the mandrel firmly.
- Set the Rivet: Squeeze the handles of the rivet gun together. As you do this, the gun will pull on the mandrel, causing the rivet to expand and form a second head on the opposite side of the material. Continue squeezing the handles until the mandrel breaks off at the pre - scored point.
- Inspect the Rivet: After the mandrel has broken off, inspect the rivet to ensure that it's properly set. The rivet should be firmly holding the materials together, and the heads of the rivet should be smooth and flush against the materials.
Troubleshooting
- Rivet Not Setting Properly: If the rivet doesn't set properly, it could be due to several reasons. The holes may be too large or too small, the rivet gun may not be gripping the mandrel correctly, or the rivet may be of poor quality. Check the hole size, adjust the rivet gun if necessary, and use high - quality rivets.
- Mandrel Not Breaking Off: Sometimes, the mandrel may not break off cleanly. This could be because the rivet gun is not applying enough force or because the mandrel is too strong. Try squeezing the rivet gun more firmly or using a different type of rivet.
Advantages of Using OEM Rivets
- Quality Assurance: OEM rivets are manufactured to strict quality standards, ensuring consistent performance and reliability. As a supplier, we have rigorous quality control processes in place to ensure that every rivet meets or exceeds industry standards.
- Customization: We can offer customized OEM rivets to meet your specific requirements. Whether you need a special size, shape, or material, we can work with you to develop the perfect rivet for your project.
- Cost - Effectiveness: By using OEM rivets, you can reduce the risk of product failures and costly rework. Our competitive pricing also makes OEM rivets a cost - effective solution for your manufacturing needs.
Conclusion
Installing OEM rivets is a relatively straightforward process, but it requires the right tools, proper preparation, and attention to detail. By following the steps outlined in this guide, you can ensure a successful installation and achieve a strong and reliable joint.
If you're in the market for high - quality OEM rivets, we'd love to hear from you. Whether you have a small - scale project or a large - scale manufacturing operation, we can provide you with the right rivets at the right price. Contact us today to discuss your requirements and start a procurement negotiation.
References
- Machinery's Handbook, 31st Edition
- ASME Standards for Fasteners
- Rivet Manufacturer's Installation Guides


