
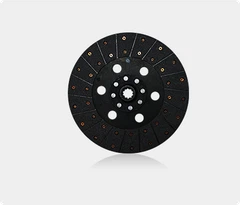
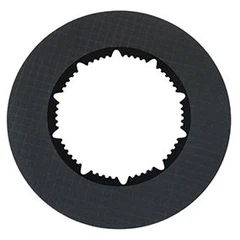
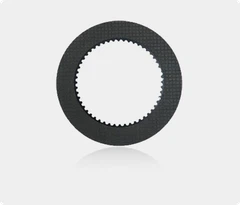

Hey there! As a supplier of Wear Resistant Sintered Clutch Plates, I've seen my fair share of clutch plate issues. One of the most common problems is a worn - out wear resistant sintered clutch plate. In this blog, I'll walk you through how to replace it step by step.
First off, let's understand why you might need to replace your clutch plate. Over time, the friction material on the clutch plate wears down due to constant engagement and disengagement. This can lead to slipping, which means your vehicle won't transfer power from the engine to the transmission efficiently. You might notice that the engine revs up, but the vehicle doesn't accelerate as it should. That's a clear sign that your clutch plate is on its last legs.
Now, before you start the replacement process, you need to gather the right tools. You'll typically need a socket set, a torque wrench, a pry bar, and a clutch alignment tool. And of course, you'll need a new Wear Resistant Sintered Clutch Plate. Make sure it's the right fit for your vehicle. You can check your vehicle's manual or consult with a mechanic if you're not sure.


The first step in the replacement process is to disconnect the battery. This is a crucial safety measure. You don't want any electrical mishaps while you're working on the clutch system. Once the battery is disconnected, you'll need to remove the driveshaft. This is usually held in place by a series of bolts. Use your socket set to loosen and remove these bolts. Keep the bolts in a safe place because you'll need them later when you're reassembling everything.
After removing the driveshaft, you'll need to access the clutch housing. This might involve removing some other components, like the exhaust system or the transmission shield, depending on your vehicle's design. Once you have access to the clutch housing, remove the inspection plate. This will give you a good view of the clutch assembly.
Next, you'll need to remove the pressure plate bolts. These bolts hold the pressure plate and the clutch plate in place. Loosen them gradually and evenly in a criss - cross pattern. This helps to prevent warping of the pressure plate. Once the bolts are removed, carefully lift off the pressure plate. You should now be able to see the worn - out clutch plate.
When you're removing the old clutch plate, be careful not to damage the flywheel. The flywheel is the smooth, circular surface that the clutch plate presses against. Any damage to the flywheel can affect the performance of the new clutch plate. You can use a pry bar to gently pry the old clutch plate off the flywheel if it's stuck.
Now that the old clutch plate is out, it's time to inspect the flywheel and the pressure plate. Look for any signs of wear, damage, or warping. If the flywheel has deep grooves or is severely worn, it might need to be resurfaced or replaced. You can use a straight edge and a feeler gauge to check for warping. If the pressure plate shows signs of excessive wear, like a burnt or glazed - looking surface, it's also a good idea to replace it.
Before installing the new clutch plate, make sure it's clean and free of any debris. You can use a clean cloth and some brake cleaner to clean the flywheel and the pressure plate. This helps to ensure a good friction surface for the new clutch plate.
Aligning the new clutch plate is a critical step. You'll use a clutch alignment tool for this. Insert the tool through the center of the clutch plate and into the input shaft of the transmission. This helps to keep the clutch plate centered while you're installing the pressure plate.
Once the clutch plate is aligned, carefully place the pressure plate back on top of the clutch plate. Start by loosely installing the pressure plate bolts. Tighten them gradually and evenly in a criss - cross pattern, using a torque wrench to ensure the correct torque settings. Refer to your vehicle's manual for the specific torque values.
After the pressure plate is installed, remove the clutch alignment tool. Then, reattach the inspection plate, the driveshaft, and any other components you removed earlier. Reconnect the battery, and you're almost done.
Finally, it's a good idea to test the clutch. Start the vehicle and shift through the gears. Check for any signs of slipping or abnormal noises. If everything seems to be working fine, you've successfully replaced your worn - out wear resistant sintered clutch plate.
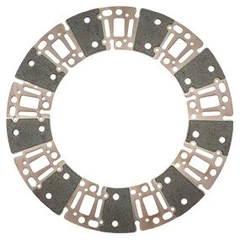
Now, as a supplier, I want to mention that the quality of the clutch plate material matters a great deal. Our Clutch Plate Material is designed to provide excellent wear resistance and performance. It can withstand high temperatures and heavy use, ensuring a long - lasting clutch system.
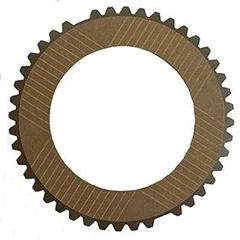
We also offer Corrosion Resistant Clutch Friction Plate Facing. This is especially important if your vehicle is exposed to harsh environments or if you live in an area with a lot of salt on the roads. The corrosion - resistant facing helps to protect the clutch plate from rust and damage, extending its lifespan.
If you're in the market for a new wear resistant sintered clutch plate or any other clutch - related products, don't hesitate to reach out for a discussion on your specific needs. We're here to help you get the right parts for your vehicle and ensure optimal performance.
References
- "Automotive Clutch Systems: Design, Analysis, and Testing"
- Vehicle repair manuals for relevant models


